 Base Layer
Layers are used to seperate different pieces of an image. Layering is supported in almost every kind of image editing software. There are different kinds of layers and not all of them exist in all programs. Layers are stacked on top of each other, and depending on their order, determine the appearance of the final picture.
The image below has no layers yet just a paintbrush and ellipse drawing. This will be the base or background layer.
Base LayerClick on the Layer drop-down menu from the top. You will see all the options you can use for layering.
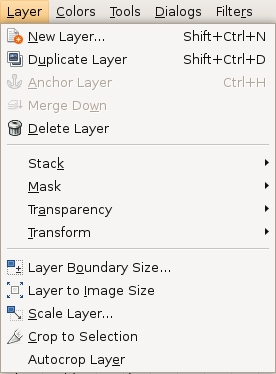 Layers Menu
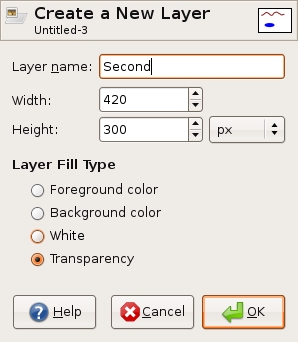
Select New Layer from the menu. Change the Layer name to something other
than New Layer
. We're going to make it Second
, but it doesn't
matter what you name it.
 New Layer
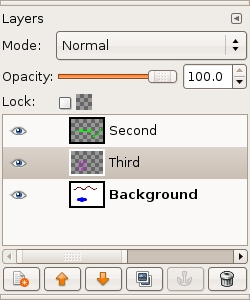
Use the shortcut Ctrl+L to show the Layers window. This makes it easier to visually see what your layers show.
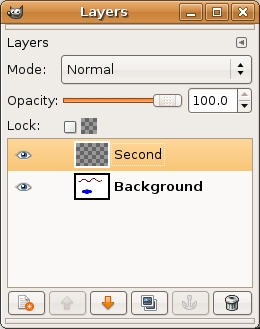 Layers Window
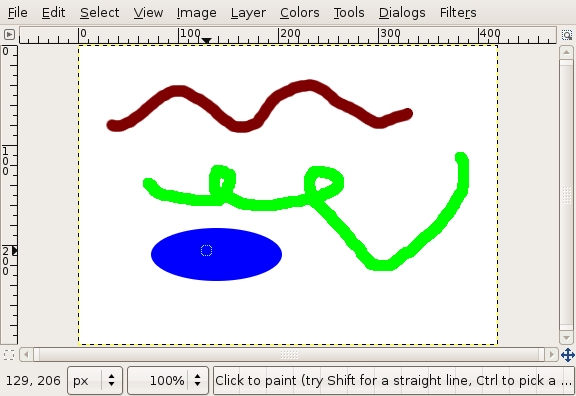
Now on the second layer we are going to draw a pencil graphic. You can see in the layers window that the pencil illustration showed up in the second layer and not the first even though if you are just looking at the canvas you could not tell that they were 2 different layers.
 Second Layer
We are going to add a new layer and title it Third. Now we have
drawn an airbrush graphic where the that covers the pencil and ellipse.
 Third Layer
If you go to the Layers window you will notice that the 3 layers are in a
specific order with the latest layer on top. We can move the Third
layer below the others and you can see what that does to the picture.

There are some other more advanced technqiues with layering that you can test out on your own.
Congratulations, you have finished Lesson 4;